Add QR-Codes
To get started, one of the first tasks is to create and to assign checkpoints to your sites.
/*! elementor - v3.16.0 - 14-09-2023 */ .elementor-heading-title{padding:0;margin:0;line-height:1}.elementor-widget-heading .elementor-heading-title[class*=elementor-size-]>a{color:inherit;font-size:inherit;line-height:inherit}.elementor-widget-heading .elementor-heading-title.elementor-size-small{font-size:15px}.elementor-widget-heading .elementor-heading-title.elementor-size-medium{font-size:19px}.elementor-widget-heading .elementor-heading-title.elementor-size-large{font-size:29px}.elementor-widget-heading .elementor-heading-title.elementor-size-xl{font-size:39px}.elementor-widget-heading .elementor-heading-title.elementor-size-xxl{font-size:59px}Create QR-Codes
- On the navigation menu, click on “Company” and from the drop-down menu choose “Checkpoints“,
- At the top navigation bar of “Checkpoints” screen click “Add” and then the “QR-Code” option,
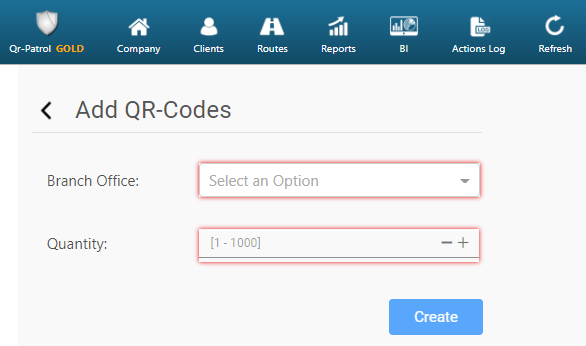
- Define the related Branch Office and then enter the quantity of checkpoints you wish to be generated,
- Finally press the “Create” button.