Add Virtual checkpoints
A Virtual Checkpoint essentially is a defined area (focal point with a range) where a guard can go through, perform a Scan and possibly some other task (just like with QR-Codes, beacons and NFC tags).
If the guards’ device location is within the area defined by a Virtual Checkpoint, then the system automatically sends a Scan event for that Virtual checkpoint.
There is even a Manual Scanning mode for Virtual Checkpoints, for full system flexibility!
/*! elementor - v3.11.5 - 14-03-2023 */ .elementor-heading-title{padding:0;margin:0;line-height:1}.elementor-widget-heading .elementor-heading-title[class*=elementor-size-]>a{color:inherit;font-size:inherit;line-height:inherit}.elementor-widget-heading .elementor-heading-title.elementor-size-small{font-size:15px}.elementor-widget-heading .elementor-heading-title.elementor-size-medium{font-size:19px}.elementor-widget-heading .elementor-heading-title.elementor-size-large{font-size:29px}.elementor-widget-heading .elementor-heading-title.elementor-size-xl{font-size:39px}.elementor-widget-heading .elementor-heading-title.elementor-size-xxl{font-size:59px}Setting up the System – Defining Virtual Checkpoints
- Navigate to Company -> Checkpoints
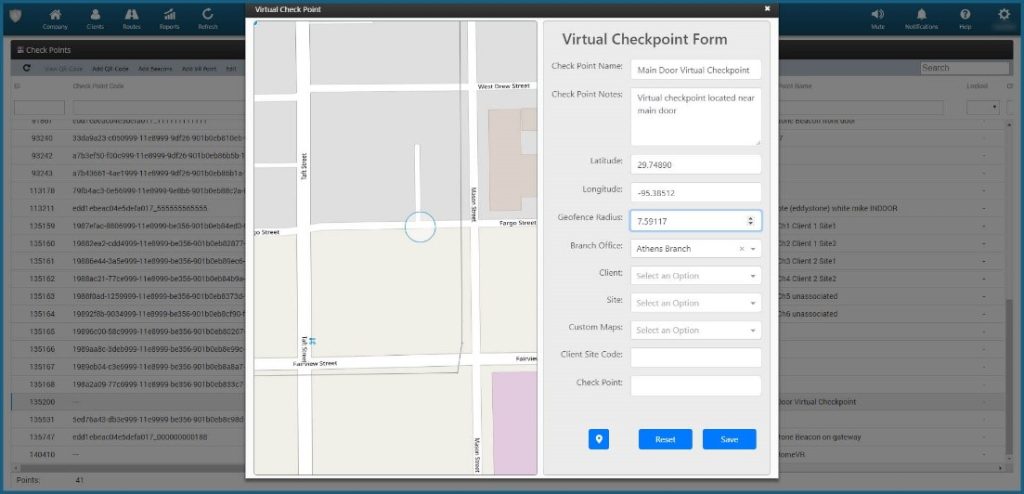
- Press on the “Add VR Point” link located on the Checkpoints panel – the system opens a new page to define the Virtual Checkpoint – most of the fields are common as with the rest of the checkpoint types (QR-Codes, NFC tags and beacons)
- You need to define the coordinates and radius of the Virtual Checkpoint – you can do so either by using the text fields or by using the map area:
a) Text fields: Insert the “Latitude”, “Longitude” and “Geofence Radius” (in meters) to define where your Virtual Checkpoint will be located.
b) Map: Alternatively, you can make use of the map:
- Navigate (by right/left clicking on the map with the mouse and keeping it pressed) and zoom-in/out the map until you find the location of interest.
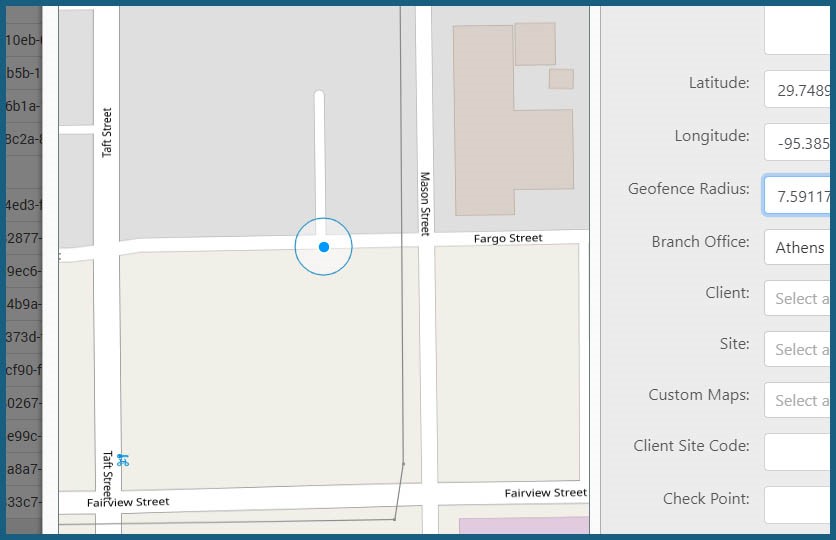
- Click on the centre of the area of interest (to define the Centre of the Virtual Checkpoint Area)
- Move the mouse from the Centre of the Virtual Checkpoint Area towards outside, until you reach the radius of your choice (see image below)
- Adjust the Virtual Checkpoint defined area, by moving the Circle on the map: you can do so by clicking on the centre of the circle (the system will show the centre – see image below) and while-clicked moving the circle with the mouse
- Fill-in the rest of the fields -just like you handle QR-Codes, NFC tags and beacons and finally press “Save”.
Setting up the System – Defining Guards Rights
The system allows you to select which of your guards can make use of the Virtual checkpoints feature, as well as how they can use them (automatic/manual mode):
- Navigate to Company -> Guards
- On “Virtual Checkpoints Scan” section, select the “Scan Mode” you wish to
- For automatic “Scan Mode”, you need to also define the Auto Mode Interval value, i.e. the period of time that the system should re-send the same Virtual Checkpoint scan automatically (if the guard is on the same area)
- Define the “Outdated Threshold”, i.e. the period of time after which the mobile application will not allow Virtual Checkpoint scan events to be performed due to outdated location
- Finally press on “Save”