Guard Groups
Through the web app, you can create Guard Groups with specific guard members and separate your staff into different teams.
The Guard Groups functionality is a great choice for faster schedule management, as it allows you to quickly assign specific Guards to your Schedules. In addition, you can use them for quick filtering in case you only need to monitor and manage activity for a particular Group of Guards (e.g., only for those working the night shift).
/*! elementor - v3.11.5 - 14-03-2023 */ .elementor-heading-title{padding:0;margin:0;line-height:1}.elementor-widget-heading .elementor-heading-title[class*=elementor-size-]>a{color:inherit;font-size:inherit;line-height:inherit}.elementor-widget-heading .elementor-heading-title.elementor-size-small{font-size:15px}.elementor-widget-heading .elementor-heading-title.elementor-size-medium{font-size:19px}.elementor-widget-heading .elementor-heading-title.elementor-size-large{font-size:29px}.elementor-widget-heading .elementor-heading-title.elementor-size-xl{font-size:39px}.elementor-widget-heading .elementor-heading-title.elementor-size-xxl{font-size:59px}Additional details
- Guards can be assigned to more than one Guard Group at the same time (e.g. “Client xx Group”, “Armed Guards Group”).
- You can only Group Guards together when they belong to the same Branch.
- Any changes to a Guard Group will also update the related schedules (e.g. if you add/remove a Guard from a Guard Group, the Schedules that contain this Guard Group will also be updated accordingly).
Create/edit a Guard Group
1. Navigate to Company >> Guards >> Guard Groups
2. Press “Add” and enter the name for your Guard Group
Tip: Use a short but descriptive name that will help you recognize the purpose of that Guard Group.
3. Select the Branch you want it created for and press “Next”.
Note: In the “Available Guards” list, you can see all of the Guards that belong to the Branch you have selected (and they are not currently assigned to this Guard Group), whereas in the “Assigned Guards” list, you can see the ones that are already assigned to this Security Group.
Select the Guards that you want to assign or unassign to this Guard Group from the respective list and use the arrows in the middle of the screen to move them between lists.
Once you are happy with your changes, press “Save”.
To edit or delete a Guard Group, simply use the respective buttons located at the main Guard
/*! elementor - v3.11.5 - 14-03-2023 */ .elementor-widget-image{text-align:center}.elementor-widget-image a{display:inline-block}.elementor-widget-image a img[src$=".svg"]{width:48px}.elementor-widget-image img{vertical-align:middle;display:inline-block} 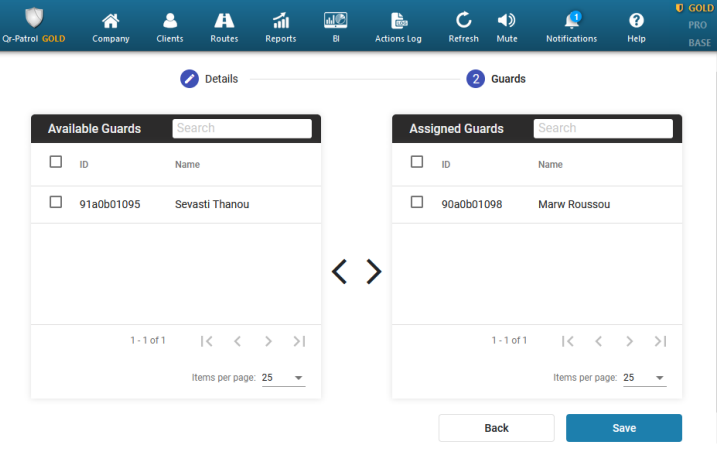
Use a Guard Group for filtering
While on the Events Browser and Schedules Page you can filter by a specific Guard Group, to easily find details and view particular actions.
Events Browser – Guard Group filtering
- Navigate to Company >> Events Browser
- On the Guards panel, press the “Guard Group” field to view the available Guard Groups
- Select the Guard Group you are interested in
Schedules – Guard Group filtering
- Navigate to Routes >> Schedules
- Press the Filter icon from the top left of your screen
- Select the Guard Group you are interested in
Use a Guard Group for Schedules creation
Guard Groups are very helpful when it comes to Schedules, as they reduce schedule creation times.
- Navigate to Routes >> Schedules
- Press “Add” to create a new Schedule
- From the “Groups” field, select the Guard Group of your interest, like in the below picture:
- Complete your Schedule creation by following the steps in the Schedules tab.
