Trail Guards
Through this feature, the system automatically draws detailed graphics on the map, which indicate the entire path it was followed by the guard, during his shift. The results can appear either on a static form, or as an animation!
To trace your Guards’ trail on the map, you first need to enable the “Tracking” option on their settings; to do that, please follow the steps mentioned below:
- Navigate to Company>>Guards, select the Guard of your interest and press “Edit”
- Under the “Tracking” section on the new screen that will appear, enable the Tracking feature by checking the “Enabled” checkbox and adjust the “Check Interval” (i.e. Time interval between position updates) as per your preference.
Setting up the system
Once the Tracking settings are enabled:
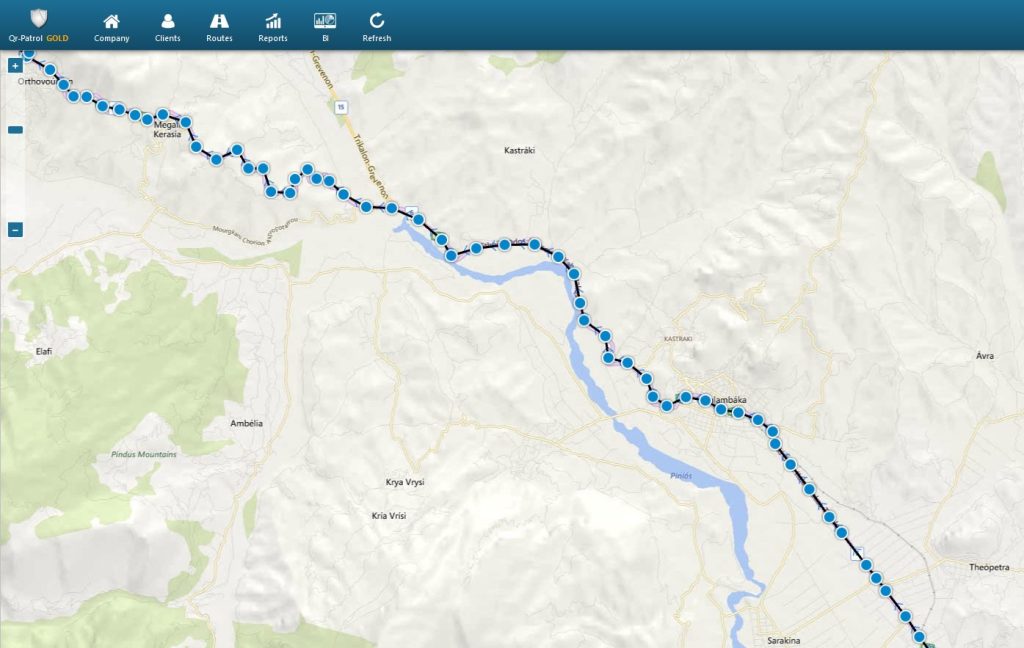
- Navigate to Company>>Trail Guards
- Under “Mode Selection”, you have the option to view your Guards’ completed routes by selecting “Completed Routes”, or a live view of their current ones with “Live View”.
Completed Routes
Once the Tracking settings are enabled:
- Under “Trail Guards Filters” select the Guard of your interest
- Define a date using the filters “From” and “To”
- Select the “Route” of your interest
- Press “Show”
- Under “Map Options”, you can either select the “Static” or the “Animation” option for the Trail depiction; the latter one depicts the Trail in an animated way – to start the animation, adjust the speed to your preference and press on “Start Animation”.
- Select the map layer you prefer and Enable/Disable the “Show Lines” option according to your preference
- Under “Extra Options”, you have the option to export a KML file by pressing on “Get KML”.
Live View
- Under “Trail Guards Filters” select the Guard of your interest (if the “Tracking” option on the Guard’s settings and the Location settings on the Guard’s device are enabled, the system will automatically zoom-in to the last recorded location and update accordingly every time a new location is sent)
- Select the map layer you prefer and Enable/Disable the “Show Lines” and “Follow Last Position” options according to your preferences.
Note: Guard Trail feature is available on GOLD version