Report Incidents
If you want to report an Incident or emergency, press the Incident button on the main patrol screen.
The Incidents list will appear *:
/*! elementor - v3.15.0 - 20-08-2023 */ .elementor-widget-image{text-align:center}.elementor-widget-image a{display:inline-block}.elementor-widget-image a img[src$=".svg"]{width:48px}.elementor-widget-image img{vertical-align:middle;display:inline-block} 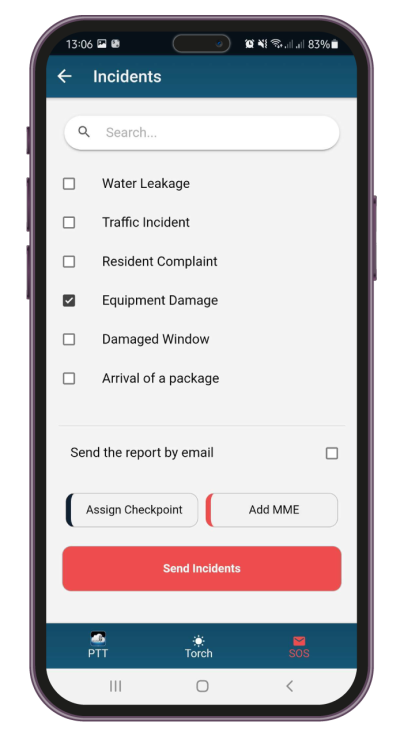
Note: For the Incidents list to appear, the Manager first needs to create Incident Types through the Web App. More information can be found here .
To report an Incident, simply select it from the list; you can also report multiple Incidents at once.
/*! elementor - v3.15.0 - 20-08-2023 */ .elementor-heading-title{padding:0;margin:0;line-height:1}.elementor-widget-heading .elementor-heading-title[class*=elementor-size-]>a{color:inherit;font-size:inherit;line-height:inherit}.elementor-widget-heading .elementor-heading-title.elementor-size-small{font-size:15px}.elementor-widget-heading .elementor-heading-title.elementor-size-medium{font-size:19px}.elementor-widget-heading .elementor-heading-title.elementor-size-large{font-size:29px}.elementor-widget-heading .elementor-heading-title.elementor-size-xl{font-size:39px}.elementor-widget-heading .elementor-heading-title.elementor-size-xxl{font-size:59px}Add Multimedia elements to an Incident
If you want to add a more detailed description to your Incident, press the Add MME button.
In the next screen, you can capture multiple photos, a video/sound recording, and add your text and signature.
Assign Incidents to Clients/Sites
Assigning an Incident to a Client/Site is useful as it will associate it with the respective location, meaning that the Clients can receive a notification of what happened in real time (more information here .
It is also helpful for the Managers in control, as they can quickly identify the location of the Incident and save time from investigation.
To assign an Incident to a Client/Site, press the Assign Checkpoint button; from there, select the type of checkpoint you want to scan and scan it – that’s it!
If there is no checkpoint around, you can utilize the List option**; simply press the Select from a List option and find the one that you want to assign the Incident to.
Note: For the List option to appear, the Manager first needs to enable the relevant setting on the Guard’s edit page. More information can be found here .