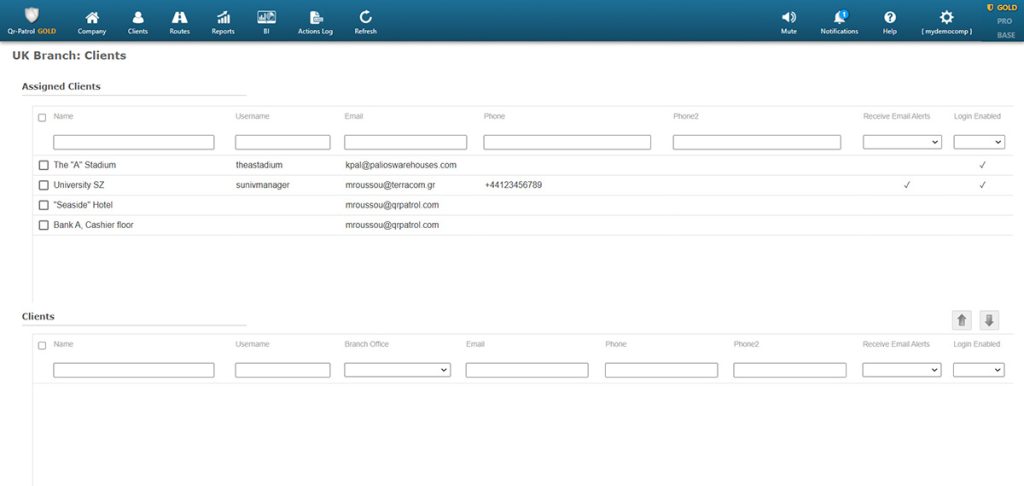
You can access your company’s branch offices panel by clicking on the top left “Company” tab and select “Branch Offices” as shown on the right.
You will be prompted to the following screen:

The panel is composed by a light blue toolbar of actions (Add Branch, Edit and Remove) and a list of your security company’s branch offices
Add a branch
By clicking “Add branch” a new page (as shown right) will appear.
Fill-in the details for the new Branch and press on the button Confirm. After completing the addition, the newly created Branch office should appear in the list of Branch offices.

Edit a branch
To edit a Branch office, select one from the list of your company’s Branch offices and click on “Edit”; a new page appears, containing 5 panels:
- Details (general data for the Branch)
- Users (list of Users assigned to this Branch)
- Clients (list of Clients assigned to this Branch)
- Check points (list of Check points assigned to this Branch)
- Guards (list of Guards assigned to this Branch)
You are able to edit the data under “Details” panel, as well as manage the list of associated Users/Clients/ Checkpoints/Guards.

- A list of assigned Clients (upper panel)
- A list of available Clients (bottom panel)

Note: Clients can login with their own credentials and monitor (only) the actions of the Guards that have taken place to their own sites!
Remove Branches
To remove a branch you must first select one from the list of branches of your Company.
After selecting one from the list, you can click “Remove” – a pop-up window will appear which will prompt you to transfer all relevant entities (users, clients, etc.) of that branch to another one. Press “Confirm” to delete it from the Branches list.
