QR-Patrol PRO gives its gold users the access to the dashboards section. The following procedure is a guide on how to open a sample dashboard called My Dashboard.
- Login to the web app with your credentials.
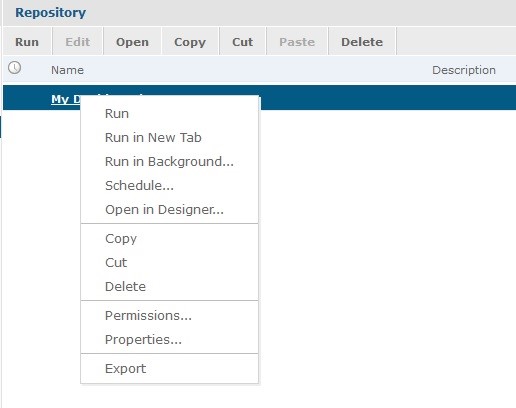
- Go to Reports -> Custom Reports -> My Repository. There you will find your own personal cluster of folders. Navigate to the Dashboards Folder. You will find a resource named My Dashboard. Left click on the name to open the dashboard. Right click on the name to open the menu:

Resource Options
Run | View the dashboard |
Run in New Tab | Opens a new window tab and displays the dashboard there |
Run in Background | Opens the dashboard but keeps it open in the background. You have the option to open it any time you wish |
Schedule | Navigates you to the schedule menu where you can create a job where you decide when and how often your dashboard will be executed, printed, sent to an email etc. |
Open in Designer | Edit your dashboard by adding, deleting and modifying its elements. |
Copy | Move your resource to another file but still, have it in your original one |
Cut | Move your resource to another file but removes it from your original one |
Delete | Remove your resource permanently. You cannot retrieve it somehow afterward.
|
Permissions | See what you are allowed to do with the selected resource |
Properties | Opens a window where you can see the following properties of the resource: Description: displays info and the elements of the Dashboard Path: displays the relative path of the Dashboard in our Server Resource ID: displays the unique ID of the chosen Dashboard Type: displays the type of the resource Created Date: displays the month and day when the Dashboard was created User Access: displays the permissions that the user has on this Dashboard |


