

In this section, we define the forms in which we want the created resource to be exported as:
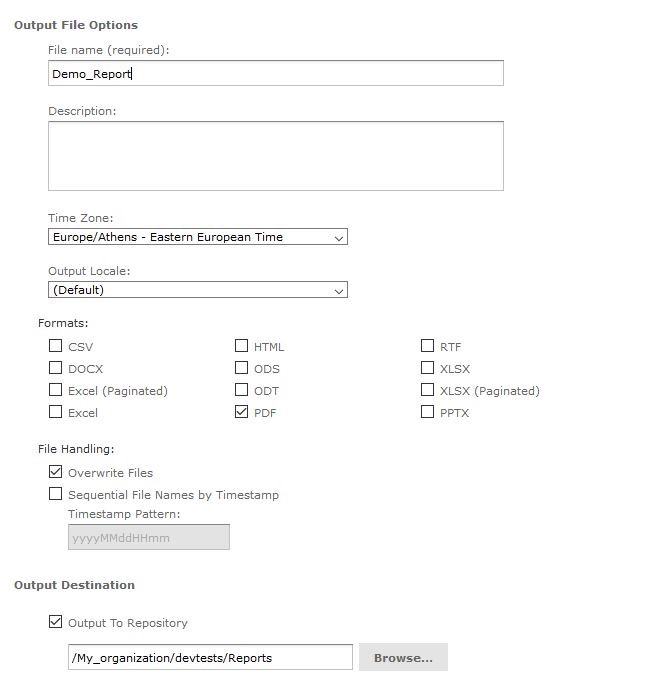
- File name (required): in this field, you are asked to fill a name for your exported resource.
- Description: in this field you are can add a description for your resource with information so you can arrange them and easily access them the next time you will be connected.
- Time Zone: here you must select your location. Define your country and Time Zone. Your data and reports will work and synchronize according to your selection. The available time zones are:
Europe/Athens | Eastern European Time |
America/Los Angeles | Pacific Standard Time |
America/Denver | Mountain Standard Time |
America/ Chicago | Central Standard Time |
America/ New York | Eastern Standard Time |
Europe/ London | Greenwich Mean Time |
Europe/ Berlin | Central European Time |
Europe/ Bucharest | Eastern European Time |
Output Locale: in this field, you can select from a variety of languages in which the resource will be exported. The available languages are:
- en – English
- de – German
- es – Spanish
- fr – French
- it – Italian
- ja – Japanese
- pt_Br – Portuguese (Brazil)
- zn_CN – Chinese (China)
Formats: presents the available formats in which you want your resource to be produced (you may select more than one output format). The available output formats are:
- CSV
- DOCX
- Excel (Paginated)
- Excel
- HTML
- ODS
- ODT
- PDF (pre-selected)
- RTF
- XLSX
- XLSX (Paginated)
- PPTX
- File Handling: here you can choose if your resource will be saved every time in a different file when executed or it will overwrite every time the old file. When you choose to save as a different file every time you are given the option of adding a date/time (you can also choose the exact expression of it) to differentiate each file. The file that is being produced will have the original name with a date extension to it.
- Output Destination: configure the location on where your resource will be saved (according to your permissions as a user). You are provided with three options:
1. Output in Repository – select a destination in your provided repository to save your schedule. If you do not have permissions to save on the selected file you will get an error message informing you about it.
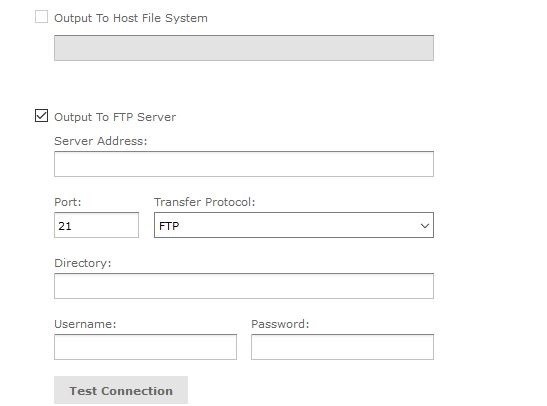
2. Output To Host File System – select a destination on the Server host machine. This option must be configured by the administrator of the system. If the checkbox is greyed out that means saving to the host file is not enabled.
3. Output to FTP Server – select a specified FTP server to save your schedule. You must have the write permission to the selected directory on the FTP server. Enter the following properties:
Server Address | The host, IP address or the URL of the FTP Server |
Port | Specifies the FTP connection port. The default port for FTP is 21, for FTPS the default port is 990 and for SFTP the default port is 22 |
Transfer Protocol | Defines the transfer protocol that the server uses. You can either select FTP, FTPS (FTP over SSL) or (FTP over SSH). If you select the last option, the SSH Key Authentication and SSH Private Key field will appear (image) |
SSH Key Authentication | check this box if the server requires an SSH private key for SFTP transfers |
Path to SSH Private Key | after you check the SSH Key Authentication box you must locate the SSH private key in the repository |
SSH Key Paraphrase | after you check the SSH Key Authentication box enter the passphrase for the SSH private key if there is one |
Directory | define the location of where the report output would be saved on the FTP server |
Username | enter your username here |
Password | enter your password here |
Output to FTP Server


