IMPORTANT: The old Mobile Form builder will be deprecated soon, so we strongly advise you to apply the new one once you get familiarized with it, by pressing “Apply new Mobile Form builder”.
Mobile Forms can be used to send instructions/questionnaires to your employees, ask them questions, or even let them freely fill in any comments or information related to specific Checkpoints/ Sites, they want to share with the monitoring center!
You have total control over Mobile Forms creation, as they are fully customizable.
Adding a new Mobile Form
Once you decide which Mobile Form elements
you will include in your form, you can start setting it up by following the
steps below:
- Press Company -> Mobile Forms.
- Press on “+Add” button displayed on the top sub-menu; the system opens a new page to add a new Mobile Form.
Adding elements to your Mobile Form
- On the left you can see your available “Form Element” options:
- Header: Read Only – Usually used for headings & heavier text. Use it as your Title, Section separator, or to give general instructions to your Workers.
- Text Input: Single Line Input – Can be used for short descriptions/comments the Worker would like to share with their Managers.
- Image: Read only – Can be used by the Manager to add an image as a reference for the Worker.
- Text Area: Multi-Line Input – Use it if you want your Workers to add more detailed information about the matter.
- Radio: Can be used for single choice answers.
- Checkbox: Usually used for multiple choice answers. Add more than 1 Checkbox elements to achieve that.
- Select: Can be used for single choice answers. More compact than the Radio element.
- Signature: Can be used to request the Worker to add their signature.
- Select (Entity Based): Can be used for searching/selecting a Guard of the system.
- Image Capture: Can be used to request the Worker to capture image(s) while filling in the Mobile Form.
- Drag your desired elements and drop them on the right part of the page.
- Once you drop an element, a pop-up window will appear; setup your element based on your needs and once done, press “Save”.
Tip: You can edit your element even after Save.
- You can preview your Mobile Form at any stage during the creation process.
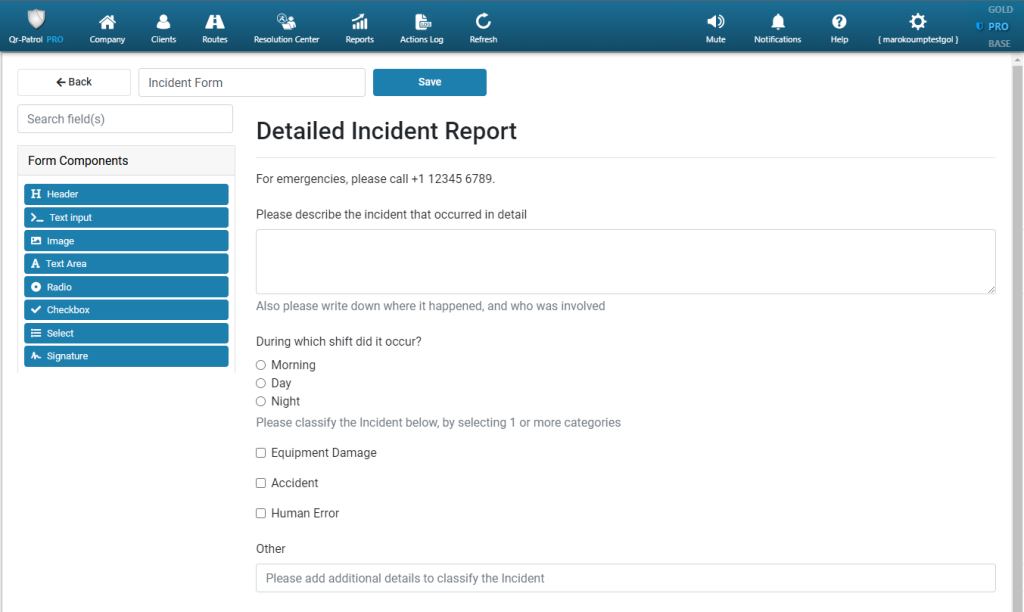
- When you are happy with your Mobile Form, add a name under “Name this Form” field and press “Save”.
Assign your Mobile Form to a checkpoint
Once you have created your Mobile Form, you can assign it to a checkpoint(s); this way, it will come up when your Workers scan the respective checkpoint in order to fill-it in.
- From the main page, select your Mobile Form.
- Press “Assign Checkpoint” from the top sub-menu
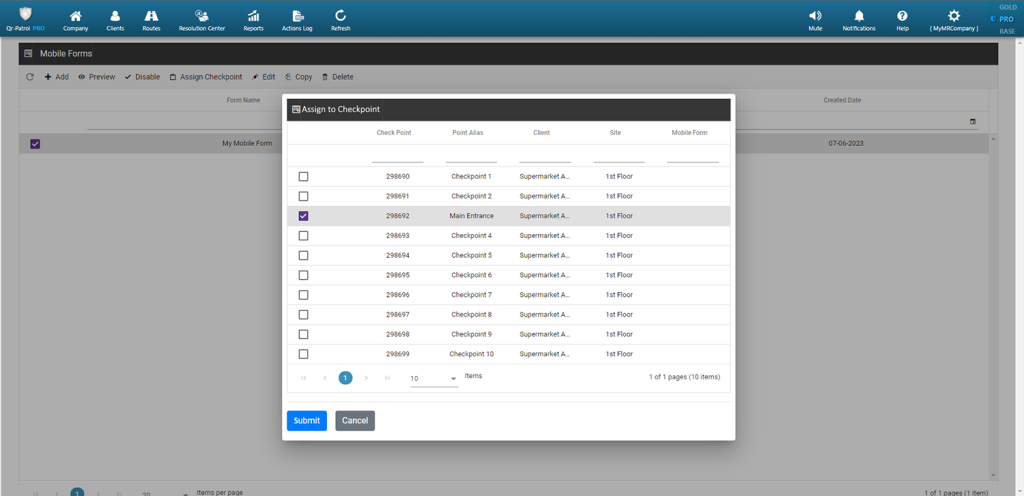
- Locate the Checkpoint(s) you want to assign your Mobile Form to and select them. • Press “Submit”.
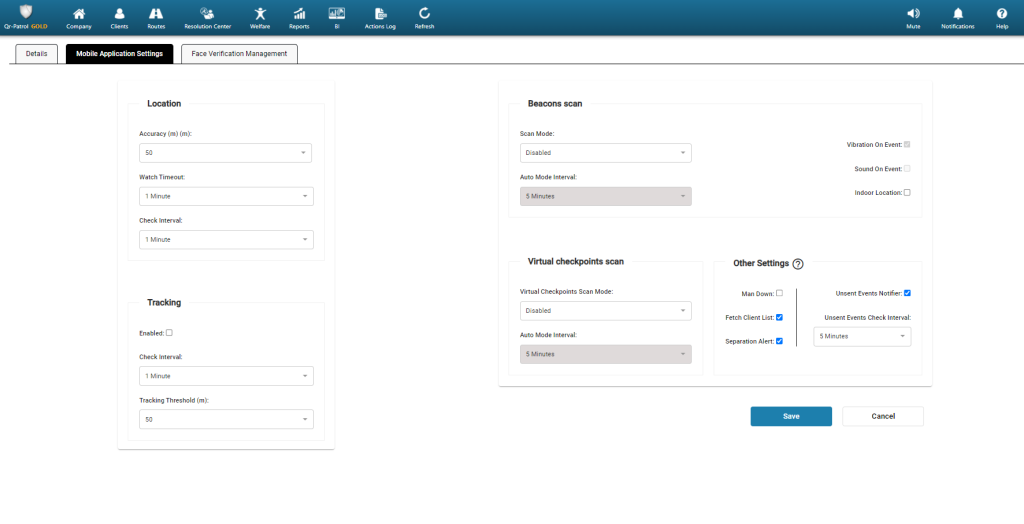
Allow the Guard to send a Mobile Form without physically scanning a checkpoint
- Access your Guard’s settings by navigating to menu “Company” >> “Guards”
- Select and edit the Guard of your interest
- Enable the “Fetch Client List” option
View Mobile Forms Answers (Filled-out Forms)
You can check the answered Mobile Forms on the Events Browser either one by one (option 1) or in bulk (option 2):
- Select the target Checkpoint Scan Event from the Events Browser panel
- Press on "View Details" button, to open a pop-up screen with details about the target Scan Event
- Field "Form" will display one of the following values:
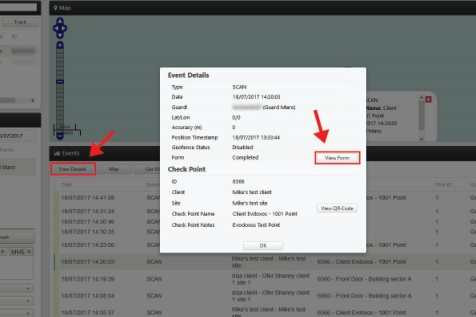
- Completed (in such case, you can see the Guard’s filled-in details by pressing on the “View Form” button)
- Not Completed (if the Guard performed the checkpoint scan but skipped filling the Form)
- Not Available (if the checkpoint is not associated with any Form)
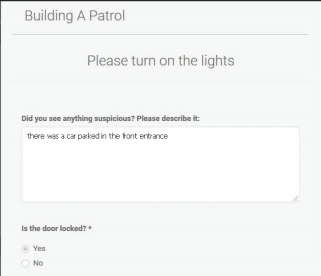
You can now check the guard’s reply in a pop-up window and proceed with your work.
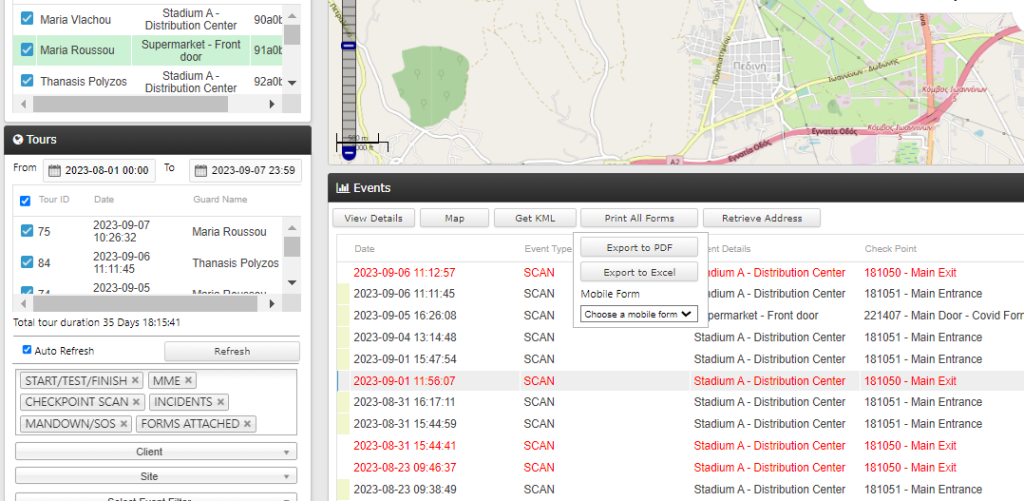
Alternatively, you can export all the submitted Mobile Forms in bulk or all the responses of a specific Mobile Form, by following the steps below:
1) Go to the Events Browser and select the related Guard(s) and Tour(s)
2) Add the “FORMS ATTACHED” filter by pressing on the filters tab of the Events Browser in order to get on the left side all the Scan Events that include a submitted Mobile Form
3) On the left, there will be available the “Print All Forms” button. By pressing on it, you have the following options:
i) “Export to PDF“: export all the submitted, filled-in Mobile Forms to a PDF file
ii) “Export to Excel“: export all the submitted, filled-in Mobile Forms to an Excel file
iii) “Choose a mobile form“: select a specific Mobile Form for which you would like to extract all relevant submitted responses