Face Verification Feature
Through this functionality, the user/manager of the web application can verify that the Guards performing the patrols are the ones who they claim to be.
The system can request verification of the guard at every Start event (i.e. when they Start their work), or before scanning checkpoints: randomly or on every Scan, based on the following settings.
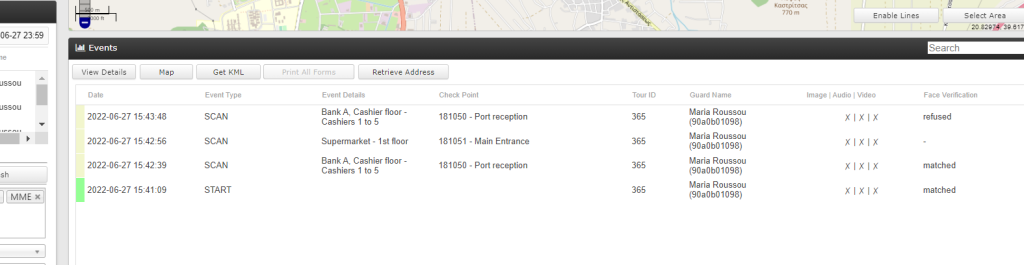
In this way, for each uploaded Start and Scan event in the web application, the manager can be sure who actually did what by checking the corresponding field.
How to set it up?
01
02
03
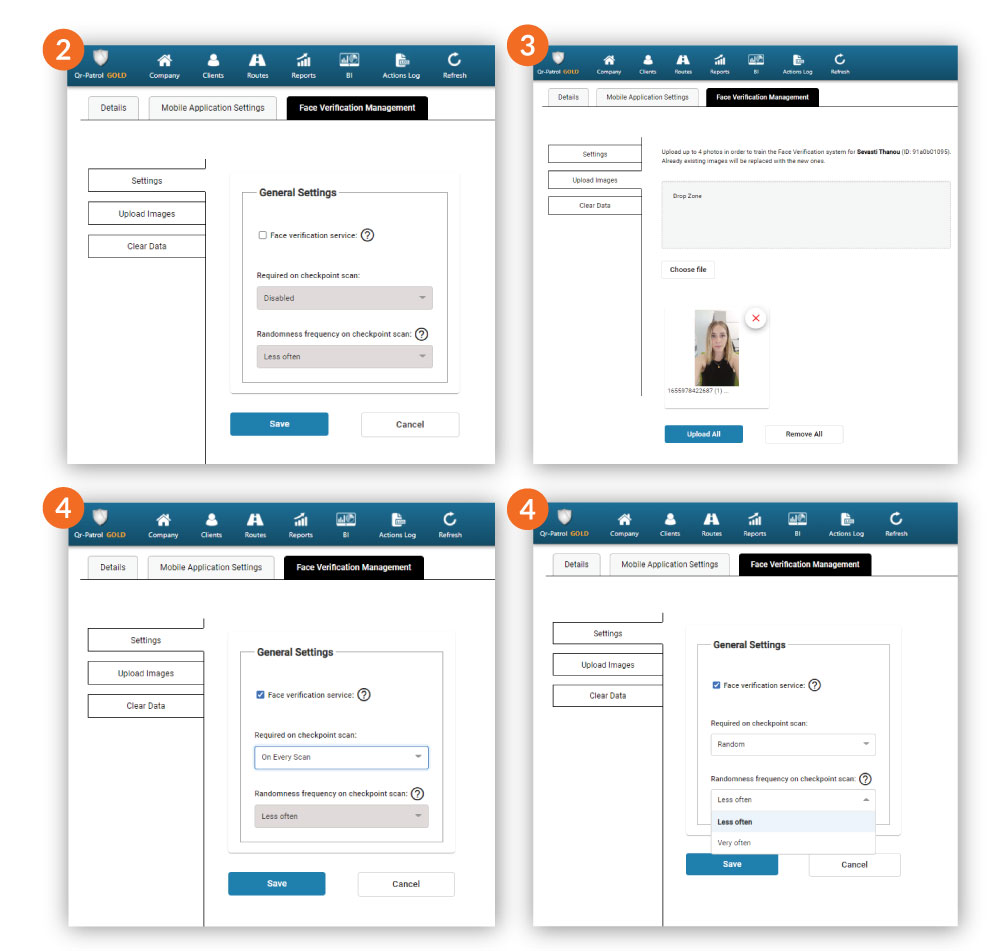
Navigate to the “Upload Images” tab to upload up to 4 photos of the selected guard. This step is needed in order to train the face verification system for that particular guard. By “training” the system, we mean the data that the system will use in order to perform the verification, each time it is required.
Drop the related images inside the “Drop Zone” area or upload them through the “Choose file” button and finally by pressing the “Upload All” button. We recommend using clear, front and side facing photos to ensure the system will achieve maximum accuracy.
04
Navigate to the “Settings” tab and enable the “Face verification service”
checkbox. When it is checked, this means that Face Verification will be required in every “Start” event.
Regarding the Face Verification of “Scan” events, you have the following 3 options:
- Disabled: the Face verification functionality is disabled for the “Scan” events
- On Every Scan: the Face verification will be required by the guard in every “Scan” event
- Random: The face verification will be required by the guard at random for “Scan” events
In random mode, there are 2 options available: “Less often” and “Very often” and are related to the frequency with which the guard will be asked for Face Verification, during checkpoint scanning.
05
Additional details
- If you have already set up the Face Verification status for a specific guard and you want to make any changes (FV status) to it, you can easily do this by editing him, clicking the respective option on the "Settings" tab, and finally by pressing the “Save” button.
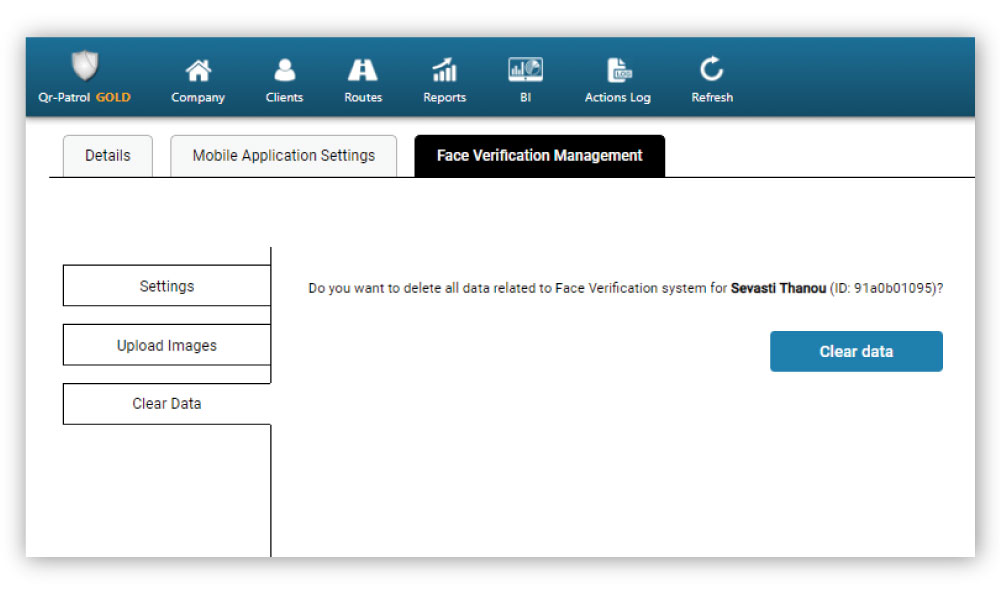
- If you want to delete all the entered data (images) related to the face verification system for a selected Guard, simply go to the "Clear Data" menu tab and click the "Clear Data" button as shown below.
This deletes all the data used by the FV system for that guard.
Afterward, if you wish, you can do the above setup process again (train the system), from the beginning for this guard.
Use after setup
- Matched: The guard has pressed the “OK ” button in FV pop-up message and the Face Verification was successful
- Unmatched: The guard has pressed the “OK ” button in FV pop-up message and the Face Verification was unsuccessful
- Refused: The guard has pressed the “Cancel ” button in FV pop-up message and he refused to be verified, but the event was uploaded successfully to the web app
- (-): Face Verification wasn’t required for this event. (e.g is in “Disabled” or in a “Random” state and was not requested)